All you need is a few tools and a screwdriver. Let’s get started!
Step 1: Remove the old pole.
This step requires loosening the nut that keeps the pole in place on the cabinet to be adjusted. For those who are uncomfortable with using a wrench, you can use equipment such as clamps or vise grips to tighten around the base of the pole instead of using a wrench directly.
When using clamps, it’s advisable to have 2 people working together for safety purposes. One person should tighten the clamp, while the other person should hold it in place with their hands. You can also use vise grips to hold the pole’s base into place while you loosen the nut.
The pole pictured below that is to be removed has 2 nuts on it, one on each side. After loosening these nuts, it’s a good idea to turn each side of the pole 1/2 turns at a time until they are both completely removed from their housing or bracket.
In this picture, the nut that is connected to the side of the pole has been loosened. The second nut is still in place, but it’s easy to remove by twisting the nut counter-clockwise. This step is crucial for safety purposes, as it helps prevent nuts from falling out of the cabinet and causing injury.
Step 2: Remove the pole from its holder.
As the picture shows, the pole is now free from its housing. The plastic bracket that holds the pole in place can now be removed from the cabinet.
Step 3: Clean the pole and attach the new one.
In order to make the new pole slide smoothly into its original slot, it’s important to clean off any dirt or debris on it by scraping it with a flat tool. Only gentle pressure should be applied to avoid damaging your cabinet.
After your pole is thoroughly clean, it’s time to attach the new one. The new pole will have a small piece of plastic between 2 prongs that are attached to each side of the cabinet’s frame.
With the 2 prongs still in place, attach the small piece of plastic on top of your cabinet frame as pictured below.
After you have this done, slide your new pole gently into place. While doing so, make sure not to apply too much force in an effort to avoid damaging your cabinet.
Step 4: Adjust the assembly.
Due to the small amount of space between the 2 prongs, it will be necessary for you to adjust this assembly. This can be done by sliding up or down the pole by using a screwdriver. You can adjust this by observing where the pole sits in relation to its mounts on either side of your cabinet frame. Adjust the pole until it sits in this position.
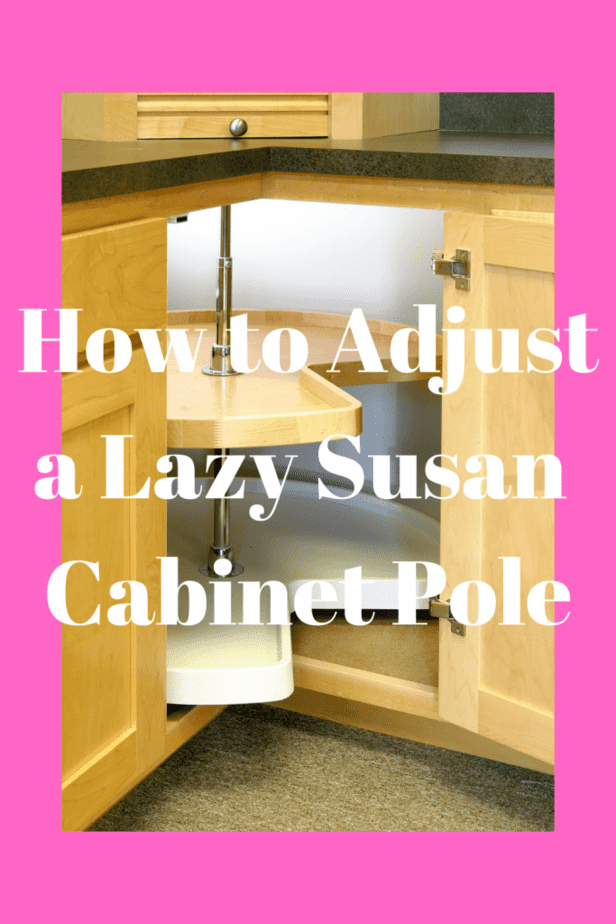
How to adjust a lazy Susan cabinet pole Overview

How to Remove Lazy Susan Shelves
Getting rid of a lazy Susan requires a few simple steps. Before you start removing the shelf, you should clean it with a clean cloth and warm water. You can use a sponge or rag to scrub the surface. Make sure that you move in circular motions so that you don’t cause any damage to the Lazy Susan. When you’re done, dry it with a clean cloth.
First, you must empty the Lazy Susan and remove the screws. This will allow you to clean it better. Next, you’ll need to take the top plate off, which should be a very easy task. Pull the Lazy Susan from the bottom, then remove the two screws holding the top and bottom shelves. Remember to wear gloves when cleaning your Lazy – reusable gloves are best for avoiding hand sprains.
After emptying the Lazy Susan, you can begin cleaning it properly. Depending on the type of labyrinth, you’ll need to use a vacuum hose attachment. A smaller hose is best for this task. When cleaning, be sure to pay special attention to dividing shelves, corners, and the cabinet base. When cleaning, remember to keep the area dry so you can avoid spreading dirt and grime.

What is a Lazy Susan Cabinet Pole?
A lazy Susan is a piece of furniture that rotates on a pole that is mounted inside a cabinet. When installing a lazy-susan, the upper section of the pole should fit inside the upper pivot in the cabinet, and the lower section should fit inside the bottom pivot.
To install a lazy-susan, you must first unscrew the screw that holds the center shaft to the bottom. After unscrewing the screw, you must reinstall the pole, making sure to tighten the bolts. If your cabinet is made of plastic, you can also use metal to make a base for your device.
How to Adjust a Lazy Susan Gate Stopper
To adjust a Lazy Suzan, you need to unscrew the center shaft bolt. This is done by loosening the bolt with a screwdriver. Then, you can slide the adjusting sleeve onto the center shaft. The sleeve slides into the hole. Then, slide it into place. The sleeve should be centered and aligned with the pivot cam base.
Next, you need to reposition the bottom shelf of the lazy Suzan. It may be too stiff to rotate. If so, you should check the position of the bottom shelf and the center pole. If it is too stiff, you may need to reposition the top and bottom shelves. If this is not the case, you can always adjust the height of the retaining clips.
When you have adjusted the top and bottom of the gate, you should check the side clearance again. If you notice that you need to increase the height of the top half of the shelf, you will need to make adjustments to the vertical pole.
If the doors are too stiff to rotate, you can adjust them by tightening the center pole and turning the hinges counterclockwise. This will change the distance the gate will swing between the top and bottom shelves. The height will be adjusted by adjusting the height of the bottom shelf. When the retaining clips are too tight, the sides will not rotate. If this is the case, you may need to tighten all set screws.
Conclusion
After you have the assembly adjusted, tighten down the nut on the side of your cabinet frame that connects to the pole. Do this by turning it clockwise until snug, then repeat with the other side.
Be careful not to over-tighten these screws, as they may damage your wooden cabinet frame. If necessary, you can use a tool such as a wrench and a screwdriver to tighten them down using various degrees of pressure to ensure a tight fit. Read about building RV Cabinet here.